
How to fix a leaky faucet is one of the most searched home repair questions, and the good news is that most drips can be stopped in a single afternoon with a few basic tools. A faucet that drips may look harmless, but those small drops add up to gallons of wasted water and a higher utility bill every month. If you already enjoy small plumbing projects around the house, this guide pairs well with our walkthrough on how to fix a running toilet, another common repair that homeowners can often handle without calling anyone. Below, the team at Plumbing Renewal breaks down why faucets leak, what supplies you need, and exactly how to repair each type so you can turn that annoying drip back into a tight, quiet seal.

Why Faucets Start to Leak
A leaky faucet almost always comes down to a worn part inside the fixture. Every time you turn the handle, internal components press together to start and stop the flow of water. Over months and years, those parts wear down, dry out, or collect mineral buildup. The most common culprits are a damaged washer, a cracked O ring, a corroded valve seat, or a worn cartridge. Hard water makes the problem worse because minerals collect on metal surfaces and stop the parts from sealing the way they should.
Knowing the type of faucet you own matters, because each style uses a different inner mechanism. There are four main types: compression faucets that use two handles and a rubber washer, ball faucets common on kitchen sinks with a single handle, cartridge faucets that move up and down and side to side, and ceramic disk faucets prized for being long lasting. Once you identify the style, the repair becomes much simpler.
Tools and Materials You Will Need
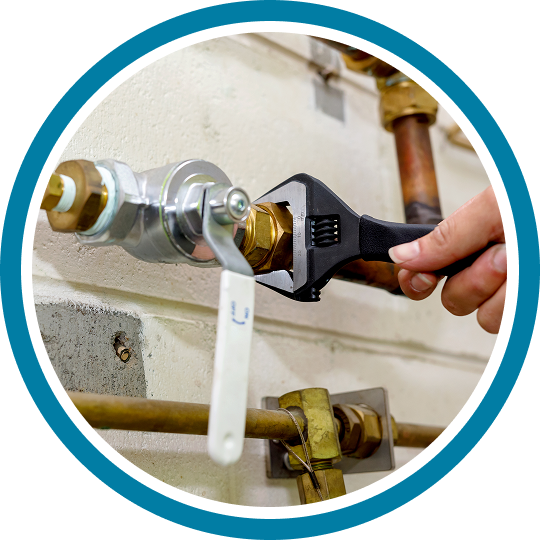
Before you start, gather your supplies so you are not running back and forth mid project. For most faucet repairs you will want an adjustable wrench, a set of screwdrivers (both flathead and Phillips), needle nose pliers, and a soft cloth to protect the finish. You will also need replacement parts that match your fixture, such as washers, O rings, springs, or a full cartridge. Pick up some plumber grease and white vinegar too, since the grease keeps new parts moving smoothly and the vinegar dissolves mineral deposits.
A smart tip is to bring the old worn parts with you to the hardware store. Faucet washers and cartridges come in many sizes, and matching the exact part by sight saves you a frustrating second trip. If you cannot find a match, write down the faucet brand and model number, which is often printed on the base or in the original paperwork.
Step One: Shut Off the Water
The single most important step is turning off the water before you take anything apart. Look under the sink for two small shutoff valves, then turn them clockwise until they stop. If your sink does not have local valves, shut off the main water supply for the whole house. After the water is off, open the faucet to release any pressure and drain the line. Close the drain stopper or place a towel over the opening so no small screws or springs disappear down the pipe.
Step Two: Take the Faucet Apart
With the water safely off, you can begin removing the handle. Most handles have a decorative cap that pops off to reveal a screw underneath. Remove that screw and gently lift the handle away. Some handles stick because of mineral buildup, so wiggle slowly rather than forcing it. Lay the parts on your cloth in the order you remove them. Taking a quick photo with your phone at each stage gives you a clear reference for putting everything back together.
Once the handle is off, you will see the inner workings of the faucet. Use your wrench to loosen the packing nut, then pull out the stem or cartridge. Inspect every piece as you go. You are looking for cracked rubber, flattened washers, white crusty buildup, or any part that looks worn compared to a fresh replacement.

Step Three: Replace the Worn Parts
This is where the actual fix happens, and the part you replace depends on your faucet type. For a compression faucet, the leak usually comes from a flat washer at the bottom of the stem. Unscrew it, slide on the matching new washer, and check the valve seat for damage while you are in there. For a cartridge faucet, simply pull the old cartridge straight up and drop in a new one that matches. Ball and ceramic disk faucets often use small springs, seals, and O rings that should be swapped as a set for the best result.
Before you reassemble, coat the new O rings and moving parts with a thin layer of plumber grease. Soak any pieces with mineral buildup in white vinegar for a few minutes, then wipe them clean. Clean, greased parts seal better and last much longer. If you discover the valve seat or faucet body itself is cracked or badly corroded, the fixture may need a full replacement rather than a simple part swap, and that is a good moment to weigh a professional faucet repair instead of buying parts twice.
Step Four: Put the Faucet Back Together
Reassembly is simply the disassembly steps in reverse, which is why those photos come in handy. Set the new cartridge or stem back into place, hand tighten the packing nut, then snug it with your wrench. Avoid overtightening, because too much force can crack the parts or strip the threads. Slide the handle back on, replace the screw, and press the decorative cap into place.
Step Five: Test Your Work
Slowly turn the water supply valves back on by rotating them counterclockwise. Let the faucet run for a moment to clear any air in the line, then turn it off and watch closely. Check around the base and under the sink for any new drips. Run both hot and cold to make sure the handle moves smoothly and the water stops completely. If everything stays dry and quiet, you have successfully completed the repair and saved yourself a service call.
Common Mistakes to Avoid
Even a simple repair can go sideways if you rush. The most frequent mistake is forgetting to turn off the water, which leads to a soaked cabinet in seconds. Another is losing track of small parts, so always work over a closed drain. Many homeowners also overtighten the connections, thinking tighter means a better seal, when in fact it cracks washers and shortens the life of the new parts. Finally, using the wrong size replacement washer or cartridge will leave you right back where you started, so double check that every part matches before you reassemble.

When to Call a Professional
A dripping faucet is usually a beginner friendly project, but some warning signs mean it is time to bring in a licensed plumber. If the leak continues after you replace the parts, water pools under the sink, the pipes knock loudly, or you notice low water pressure throughout the house, the issue may run deeper than the faucet itself. Corroded valves, damaged supply lines, and hidden pipe leaks all call for professional tools and experience. There is no shame in calling for help, especially when a small mistake on an old fixture can turn into water damage that costs far more than the repair.
If you live in the Portland area and would rather leave the job to an expert, the team at Plumbing Renewal handles faucet repairs, leak detection, and fixture replacements every day. Our plumbers arrive with the right parts on the truck, fix the problem the first time, and leave your sink working like new.
Final Thoughts
Learning how to fix a leaky faucet is one of the most rewarding home skills you can pick up, since it saves water, lowers your bill, and silences that maddening drip. Start by identifying your faucet type, gather the right tools, shut off the water, and replace the worn parts with care. Most repairs take less than an hour and cost just a few dollars in parts. And when a leak refuses to quit or the fixture is simply worn out, remember that professional help is only a phone call away. Either way, you now have everything you need to stop the drip and keep your plumbing running smoothly.
Frequently Asked Questions
Why is my faucet still dripping after I replaced the washer?
If the drip continues after a fresh washer, the problem is usually the valve seat or the O ring rather than the washer itself. A rough or corroded valve seat will keep tearing new washers and let water seep through. Inspect the seat for buildup or damage, clean it with vinegar, and replace any worn O rings as a set for a complete seal.
How much water does a leaky faucet actually waste?
A faucet that drips once per second can waste more than 3,000 gallons of water in a year. That is enough to fill dozens of bathtubs and it shows up directly on your utility bill. Fixing the leak quickly is one of the easiest ways to lower your water costs.
Can I fix a leaky faucet without turning off the water?
No, you should always shut off the water first. Taking a faucet apart with the supply on will spray water across your cabinet and floor within seconds. Close the two shutoff valves under the sink, or the main supply if there are no local valves, before you remove any parts.
How long does it take to fix a leaky faucet?
Most faucet repairs take 30 to 60 minutes once you have the right replacement parts on hand. The repair itself is quick, so the biggest time saver is matching your washer, cartridge, or O ring correctly before you start.
When should I replace the whole faucet instead of repairing it?
Replace the entire fixture when the faucet body is cracked, heavily corroded, or when you have already swapped the internal parts and it still leaks. Older faucets with discontinued parts are also better replaced than repaired, since matching components becomes difficult and costly.
Do I need a plumber to fix a leaky faucet?
Many leaks are simple enough to handle yourself, but you should call a licensed plumber if the leak persists, water pools under the sink, or you notice low pressure throughout the house. These signs often point to a deeper issue with the valves or supply lines that needs professional tools.